How to add Prismjs in WordPress website – NO PLUGIN
How to add prismjs in WordPress. In this article, I am going to show you how we can highlight code using PrisamJS in WordPress, and yes! we do need a plugin to do it. Here I show you a quick, 4-minutes easiest way to add it to your own WordPress website. No plugin is required at all. Syntax highlighting to your WordPress site and blog posts built with either the Gutenberg editor or the classic editor?
What is PrismJS?
Prism is a lightweight, extensible syntax highlighter, built with modern web standards in mind. It’s used on millions of websites, including some of those you visit daily.

Currently, PrismJS have 9.1k Stars and 1.1k Forks on GitHub.
Not sure what I mean by a code highlighter or wondering what a syntax highlighter does? Here is an example.
Default Code looks like.
//** *Enable upload for webp image files.*/
function webp_upload_mimes($existing_mimes) {
    $existing_mimes['webp'] = 'image/webp';
    return $existing_mimes;
}
add_filter('mime_types', 'webp_upload_mimes');

//** * Enable preview / thumbnail for webp image files.*/
function webp_is_displayable($result, $path) {
    if ($result === false) {
        $displayable_image_types = array( IMAGETYPE_WEBP );
        $info = @getimagesize( $path );

        if (empty($info)) {
            $result = false;
        } elseif (!in_array($info[2], $displayable_image_types)) {
            $result = false;
        } else {
            $result = true;
        }
    }

    return $result;
}
add_filter('file_is_displayable_image', 'webp_is_displayable', 10, 2);
WOW! Using PrismJS or any Syntax Highlight Library.
//** *Enable upload for webp image files.*/
function webp_upload_mimes($existing_mimes) {
    $existing_mimes['webp'] = 'image/webp';
    return $existing_mimes;
}
add_filter('mime_types', 'webp_upload_mimes');

//** * Enable preview / thumbnail for webp image files.*/
function webp_is_displayable($result, $path) {
    if ($result === false) {
        $displayable_image_types = array( IMAGETYPE_WEBP );
        $info = @getimagesize( $path );

        if (empty($info)) {
            $result = false;
        } elseif (!in_array($info[2], $displayable_image_types)) {
            $result = false;
        } else {
            $result = true;
        }
    }

    return $result;
}
add_filter('file_is_displayable_image', 'webp_is_displayable', 10, 2);
So, let’s start applying Prism.js syntax highlighting into your WordPress site without a plugin. I try to avoid adding too many plugins whenever possible so my site loads faster.
Prism is a lightweight, extensible syntax highlighter, built with modern web standards in mind.
1. Choose Prism Options | Download
Download prism.js and prism.css: Download Page PrismJS
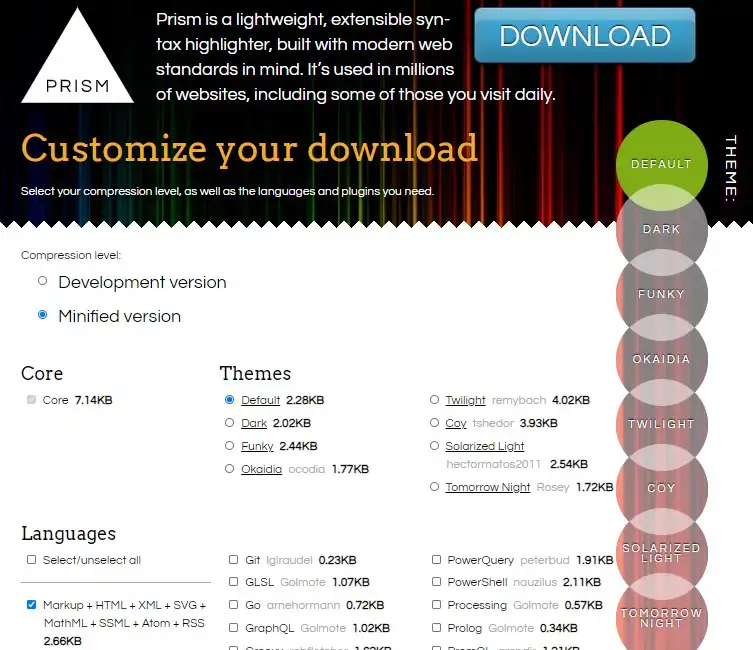
Here, you will see a whole bunch of options that you can choose to customize how your code will look with Prism. For the first section that says “Compression level”, choose “Minified version.” This will shorten the amount of text used in the background code, therefore allowing it to run quicker on your site.
Okaidia theme looks good, but feel free to choose whatever theme you think will look best with your site. Next, choose the languages that will be used within the code blocks on your site.
Defaults checked are Markup, CSS, C-like, and JavaScript. I also chose PHP because WordPress snippets of code are almost always written in PHP. That covers the vast majority of languages that I plan to show in my blog posts. You can also choose Python, SQL, TypeScript, or any other according to your need.
As far as plugins go, you can read about those yourself by checking out the “Plugins section“. Plugins give a little extra functionality if you demand such as having line numbers, adding a “copy button” to the code so others can easily copy it. I personally chose the “Copy to Clipboard Button” plugin which you can see by hovering over any of the prettified code snippets on this page.
2. Download Prism JS and CSS Files
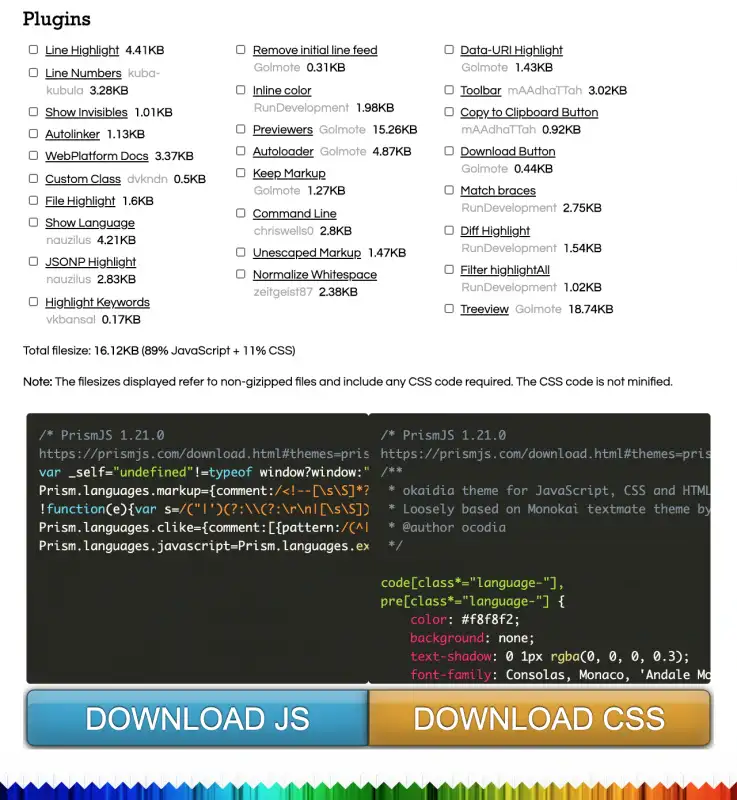
In the download section, there are two buttons download JS and download CSS. download both.
Select (1) Minified, (2) your preferred theme (I use Okaidia), (3) the languages you are going to use (if in doubt, select all – this will increase the js size though.
Save files as prism.js and prism.css
3. Move files to your theme folder
Move prism.js and prism.css to wp-content/themes/{your-theme-name}
example: move prism.js and prism.css to wp-content/themes/generatepress
for moving js/css files into theme-folder you can use Cpanel or any other tool provided by your hosting companies. OR if you don’t have Cpanel/File Manager access then you can use WordPress File Manager “Link File Manager” plugin. you can use any File manager plugin but make sure that plugin has good reviews. through this plugin, we can access all directories of our website within the WordPress dashboard. But I recommend using cPanel or other Cpanel-type tools because it’s not good to use many plugins.
Be Careful: move prism.js and prism.css to your child theme directory. WHY? If your theme update comes in the future and you’ll update the theme then prism.js and prism.css will be removed. Solution: Every WordPress theme has its own Child theme. If you do have not a child theme then you will generate a child theme by following any tutorial or visiting the theme creator website and contacting the support team, they will provide you child theme.
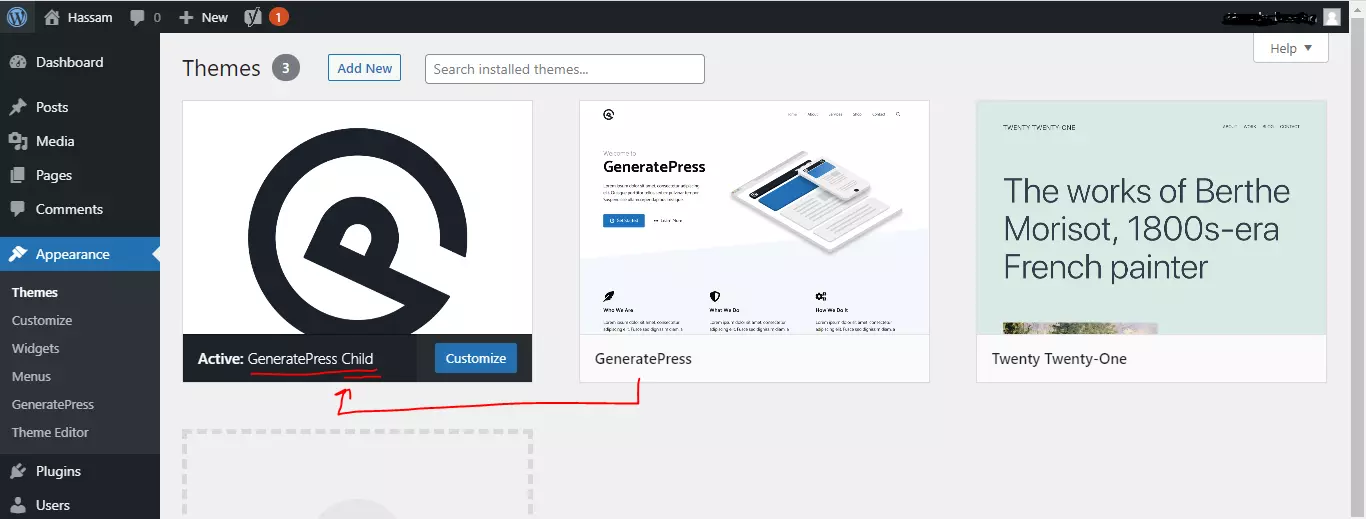
4. Add PHP in functions.php
Edit child-theme functions.php.
You should NEVER modify the parent theme’s functions.php file because, after your theme updates, you will probably lose any work you did in your parent theme’s functions.php file.

<?php
/**
 * Add custom functions here
 */

// Function to add prism.css and prism.js to the site
function add_prism() {

    if ( is_single() && has_tag( 'code' ) ) {

        // Register prism.css file
        wp_register_style(
            'prismCSS', // handle name for the style
            get_stylesheet_directory_uri() . '/prism.css' // location of the prism.css file
        );

        // Register prism.js file
        wp_register_script(
            'prismJS', // handle name for the script
            get_stylesheet_directory_uri() . '/prism.js' // location of the prism.js file
        );

        // Enqueue the registered style and script files
        wp_enqueue_style('prismCSS');
        wp_enqueue_script('prismJS');

    }
}
add_action('wp_enqueue_scripts', 'add_prism');
you have many options to load prismjs on the specific page, posts having specific tags, and more. Please follow the documentation of prismJS.
5. Use PrismJS in WordPress Gutenberg
Add a paragraph block and set it as a code: I’ll show you how to use Prism JS in the WordPress Gutenberg editor & also the Classic editor. Basic usage of PrismJS
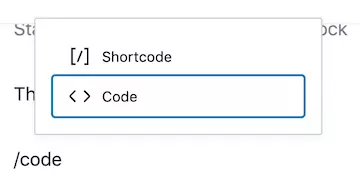
Choose the code block and type or paste the code that you want to show. and then on right side click the Block tab and toggle the Advanced section and find an input where we need to add CSS class. Alternatively, use an HTML block with…
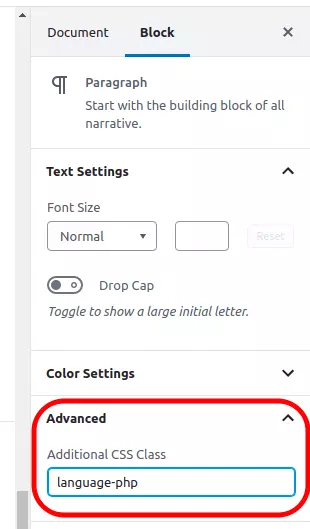
If you are unsure what you should put after the language- piece, check out the supported languages section on the PrismJS site.
Alternatively, use an HTML block.
<code class="language-javascript">
var myObject = {
    property1: "something",
    property2: 5,
    property3: true
};
</code>
That’s all! If you are having trouble, regarding How to add Prism.js on WordPress, then let me know in the comments!

Pеϲuliar articlе, exactly what I neeⅾed.
Thank you for your good explanation.
Can you give an example in this field for the classic editor, so that this “CSS Class” value can be entered automatically?